Showing posts with label DIY. Show all posts

Thursday, February 9, 2012

Candy Valentine's Hearts

These are super easy Valentine's hearts with a candy middle. You can do them any shape though for any occasion. Stars work well as do leaves.

Use this sugar cookie recipe and make 1 batch. Roll it out. For each cookie, cut out 1 large heart.


Remove the dough from around it and cut a smaller heart out of the middle.


I ordered a set of five heart cookie cutters from King Arthur Flour. The largest is the outside of the cookie and the smallest is the inside heart.


Transfer this frame to a baking sheet.

Now, for the candy part. Take a handful of Jolly Ranchers, unwrap them, place them in a Ziploc bag, and then put that bag into a paper bag, and crush them with a hammer. The pieces need to be very small. If you want to center to be a specific color, you'll have to separate the colors before you crush them. If you don't, it will turn out either marbled (which would be very cool) or brown (which would not be very cool).
Fill the frame with crushed candy-- but do not over fill!!


Bake however the recipe says to. When they come out of the oven, the candy should be liquid and bubbling.


Leave them on the tray for at least 10 minutes. When the candy is clear and the cookie is cool, try lifting just the edge. If the candy peels off the tray and stays with the cookie, it's cool enough to move it to a cooling rack. If you try to move it too soon, the candy will get messed up and stick to everything.


You could always frost the frames but I like them plain.
Back to the note about overfilling the frame, this is what it looks like when you overfill it:

This was not on purpose. I overfilled the first one I made. Oops.

I made these for my classmates in a few classes and I wrapped them in tin foil to keep them clean and make it look nice.

Place cookie on piece of tin foil. 
Fold top and bottom over.

Fold left side into a triangle.

Fold the triangle over the cookie. Fold the other side over and flip over.

I pressed the edges to make the heart show up but you don't have to.
Sharpies show up well on the tin foil so I used a red one.
Happy (early) Valentine's Day!

A Very Maine Valentine's

Maine has all these things about it. Unique things. But no Valentine's treats (except candy lobsters). These are very Maine and very Valentine's. It was my dad's idea. ;)

Since the focus is on the shape and decorating, I'm not going to post a sugar cookie recipe. This one is what I used though and I really like it. 

So, what you are about to make is a bakery-worthy Maine Valentine's cookie. So you'll need:

1 batch sugar cookie dough
1 lobster cookie cutter
1 heart (or other shape) cookie cutter


Roll out the dough and cut out a lobster and a heart.


Remove the dough around the cut-outs and move the lobster to a baking sheet.


Now, take the lobster cookie cutter, and use the tips of the claws to cut shapes out of the heart.


Place the cutter just over the edges of the dough (above) and then slide away (right). This will leave a cut out of the bottom of the heart in the shape of the lobsters claws. This will keep the cookie from having a big lump in the middle. That probably doesn't make sense yet but the next step should clarify it.


Place the heart on the baking sheet just about the lobster and slide it so that the lobster's claws fit into the cuts you made in the hearts. Like a puzzle. Press down to seal them together into one cookie.

Slide them together...

...press to seal.
Bake the whole thing according to the directions in the recipe. Let it cool for awhile when it comes out of the oven because if you try to move it to a cooling rack while it's warm, the tail or the claws will probably break off. On that note, you should probably make more of these than you think you need because they break a lot when they're fresh.

Make the icing from the recipe above and put a small amount of red food coloring in it to make it pink. Frost just the heart(s).

I made mine with a cookie cutter that was two hearts stuck together.
Add more red food coloring to the icing to make it red. If you don't like food coloring, you don't have to use it. Or you could find a natural alternative. It's up to you.
Now do the lobster with the red icing.


Tada! I made one of these for each of my teachers and they all liked them. I think they're really funny. And yummy (I made a rhyme!). I use a pastry brush to apply the icing because it makes it thinner and it gives it a really smooth icing. Also, the recipe for icing in the recipe I mentioned at the top is perfect for brushing on. It also hardens in an hour or two so you can package the cookies without ruining the frosting.

Monday, December 26, 2011

Christmas Sunday Hairstyle

This year I decided to try a Taylor Swift inspired hair style from her song Love Story. The hairstyle is done with very curly hair so you will need to curl your hair in ringlets. Look here or here for tutorials. You could always use a curling iron too.

So this is how Taylor's looked:


And this is how mine looked:


Besides our hair being a different color and my skin not being flawless and not having a professional hair stylist and numerous other things including my 5 minutes of time in which to do this, I think I did pretty well. It took 19 bobbi-pins. :p
Here is a video tutorial on how to get the look. Hope you are successful if you decide to try this!

Monday, December 12, 2011

Easy Christmas Present

Here is an extremely easy Christmas present for classmates or even a little something extra for siblings!


Two candy sticks in traditional Christmas flavors tied with a Christmas themed ribbon. I got the candy sticks and Cracker Barrel for $0.20 each and a spool of ribbon at a craft store. I bought Peppermint, Cinnamon, and Clove for flavors, but you could pick whichever flavors you wanted. Easy gift for classmates? I say yes! :)

Here also is an awesome Christmas song that I just love!


Monday, November 21, 2011

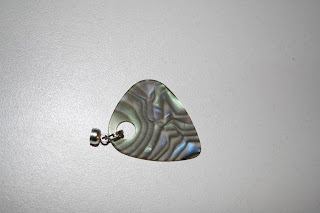
DIY Earrings for Guitarists

(Or for not-guitarists, it's flexible :)


So you're going to need:


1. Punch a hole in whatever corner of the pick you want. If you would like to be able to use the pick to play, don't punch it in the corner you play with. 

2. Attach one of the small rings to the pick and to one end of the magnetic clasp. 


3. Attach another small ring to the earring hook and the other end of the magnetic clasp.


          TIP: before you go through the pain of attaching the rings to the magnets, check that the magnets belong to each other!

Repeat the same process for the other one and there you have it! Guitar pick Earrings.


Now when you find yourself without a pick, just detach the magnets and you can use it to play! I prefer using the magnets to hold the pick onto the earring because taking the earring out every time is annoying and takes a long time. Plus then you have an actual earring getting in the way when you play. Another thing you can do (if you don't have your ears pierced, or if your a guy, or for whatever reason) is do the same thing except put it on a cord or chain and wear it around your neck or wrist.